There are a lot of bolts on the front of a 944 engine. A lot. And the ones on this filthy 2.5 16v motor seem to have been there, undisturbed, for a very long time - along with the muck. There was even a spiders nest!
However, I can say that there doesn't seem to be any front engine oil leakage - the culprits being the rear balance shaft seals. Requiring that all the belts and gears, along with everything else on the front of the motor, be removed first. My local Porsche indy budget 8.5 hours to do this - it's a big effort and one that I'm glad I'm not doing with the engine in the car.


Getting that gasket off was not an easy task - it had become bonded to the face of the block but was eventually all removed and cleaned up with some more elbow grease.
After removing the front plastic belt cover the main crankshaft bolt was next on the list. One broken breaker bar later, only the intervention of the impact wrench could shift it - not before buying another, longer, breaker bar failed to budge the bolt from the depths...

Lesson learned: Go to the impact wrench first.
With those two items out of the way I worked through the other numerous bolts and nuts removing part after part beginning with the three bolts attaching the distributor cap then the front of the cover over the camshaft gear - note the position of the marker in the cover casing and the notch on the cam gear signifying that the engine is at top dead centre.
The balance shaft belt is easy enough to do after loosening the tensioning idle pulley - then it's a matter of figuring out which other bolts to remove next. I was hoping to remove the back plastic belt cover next but it can only be accessed once the cam belt and both balance shaft gears have been relieved of their duties - there's no short cut.

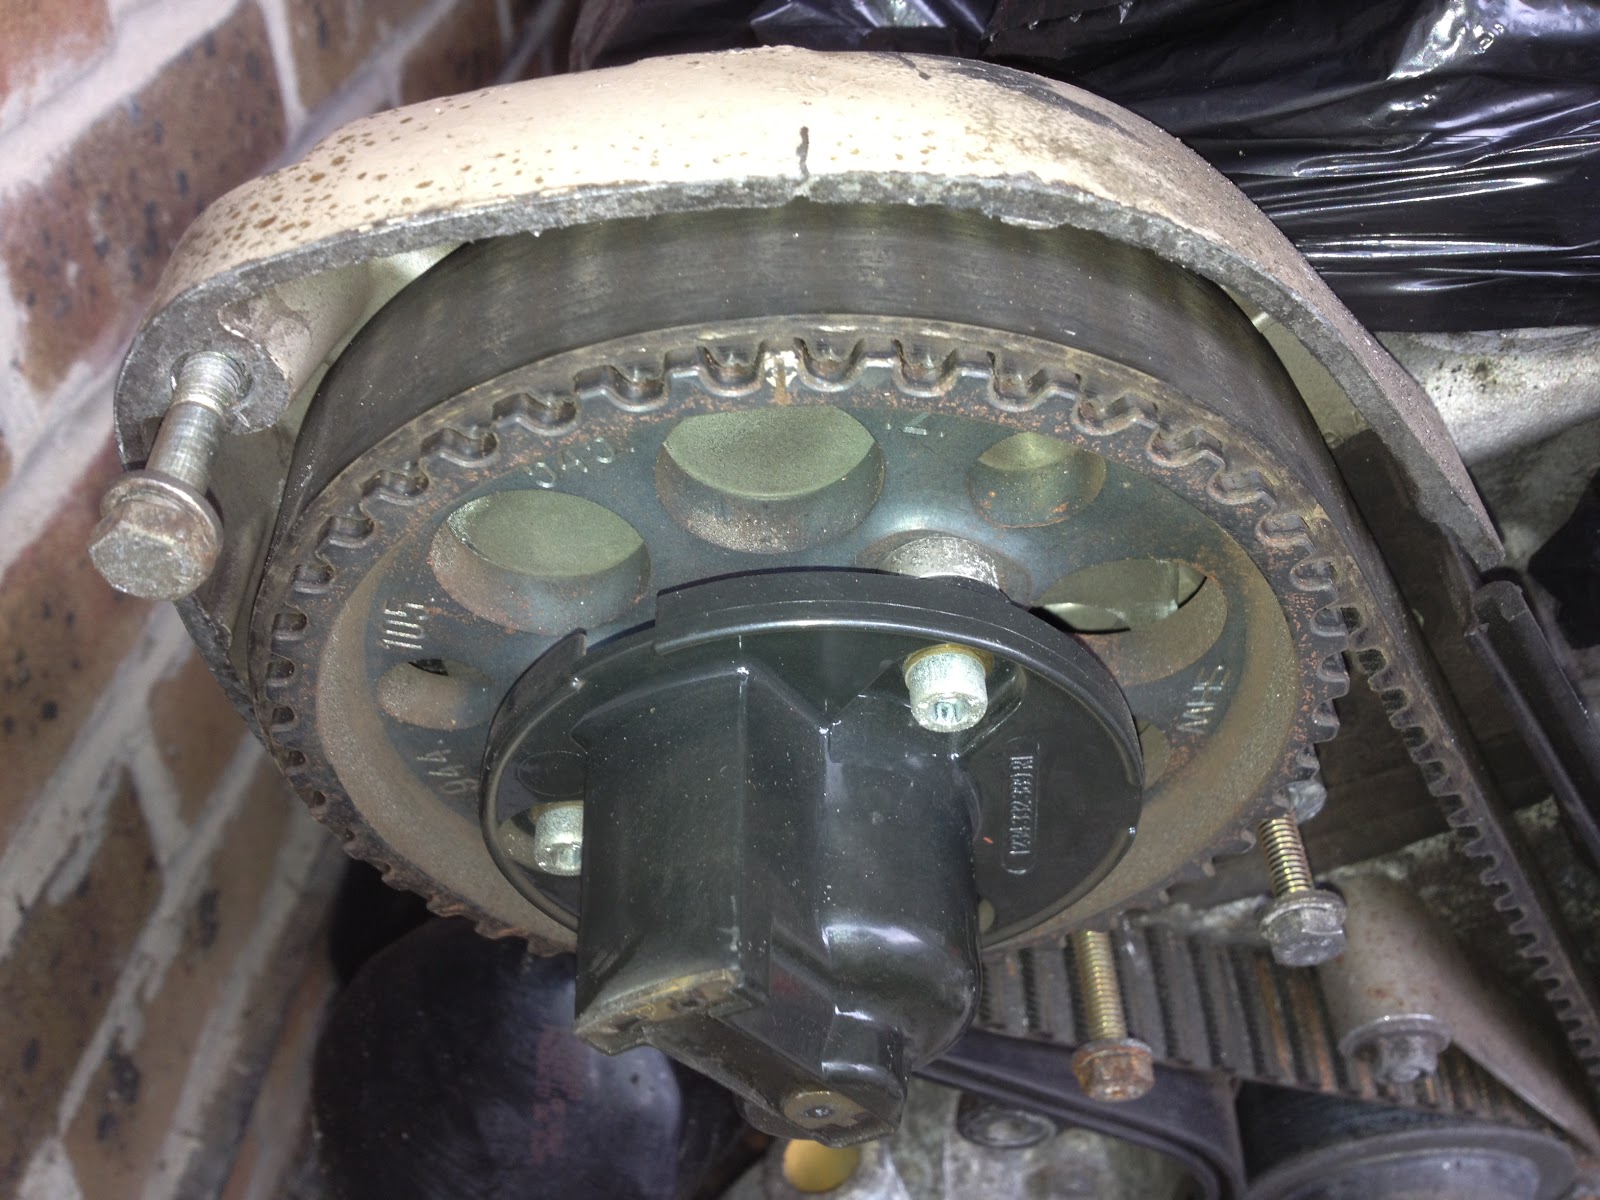
I discovered a neat way to hold the balance shaft gears securely enough to undo the bolts (seeing as though I don't have a special tool) - wedging a 17mm spanner between the other bolts and rollers as seen below. Doing this made loosening the bolts very straight forward.


Then came the cam belt tensioner. This one is fairly rusty but much to my relief still works quite effectively. The spring needs to be compressed in order to slacken the tension on the cam belt so that it can be slid off the cam and crank gears. I did this by leveraging a screw driver into a cavity in the front of the engine block and pushing the tensioner to the right compressing the spring - releasing the tension on the belt enough to slide it off the gears with another screw driver.


I'm hoping this will clean up nicely after a bit of rust remover or sand blasting. With that gone the front end starts to look a lot less cluttered.

Then it was time to extract the water pump. I had already noticed the lack of seal on the thermostat and general rustiness inside...

- so I was expecting nasty rusty internals and I wasn't wrong! This water pump is long gone!

Now revealed on the front of the engine block are some water passages - thankfully they look ok but it's obvious where the rusty water pump impeller was sitting.

Getting that gasket off was not an easy task - it had become bonded to the face of the block but was eventually all removed and cleaned up with some more elbow grease.
The next task will be to remove the lower balance shaft housing, which doubles as the power steering pump bracket; and to remove the oil pump - I have some nice clean ones to go back on!
Comments
Post a Comment